
Creating a CPC banner advert on Snipesearch Adclicks is a straightforward process once you understand the updated 2025 workflow. The platform now guides you through each stage in a clear sequence, starting from selecting the advert format and uploading your banner, through to setting your CPC rate, budgets and full targeting options. This updated guide reflects the exact steps shown in the new interface as of November 2025, ensuring you can create a fully functioning CPC banner campaign without confusion or missing any required fields.
Step 1: Open the Advertiser Dashboard
Go to https://adclick.snipesearch.co.uk/index.php?page=dashboard/advertiser-home and make sure you are viewing the advertiser dashboard. This is where all banner campaigns are created and managed. When the advertiser menus are visible, you’re ready to begin.
Action: Make sure you are in the advertiser dashboard.
Step 2: Access the Ads Section
On the left-hand side, click Ads. When the menu expands, choose Manage Ads. This section displays all existing campaigns and also contains the button used to create a new one.
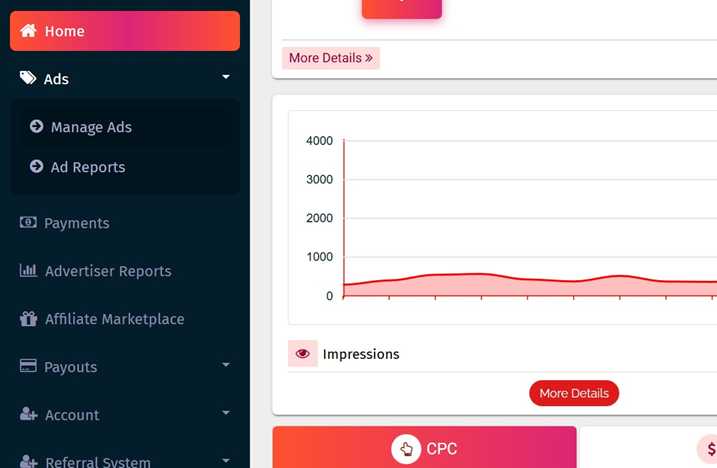
Action: Ads → Manage Ads.
Step 3: Create a New Banner Advert
Inside Manage Ads, click Create Ad. The system will open a window asking which ad format you want to create. Select Banner Ad. This loads the banner-specific setup screen where you enter your URL fields and upload your creative.
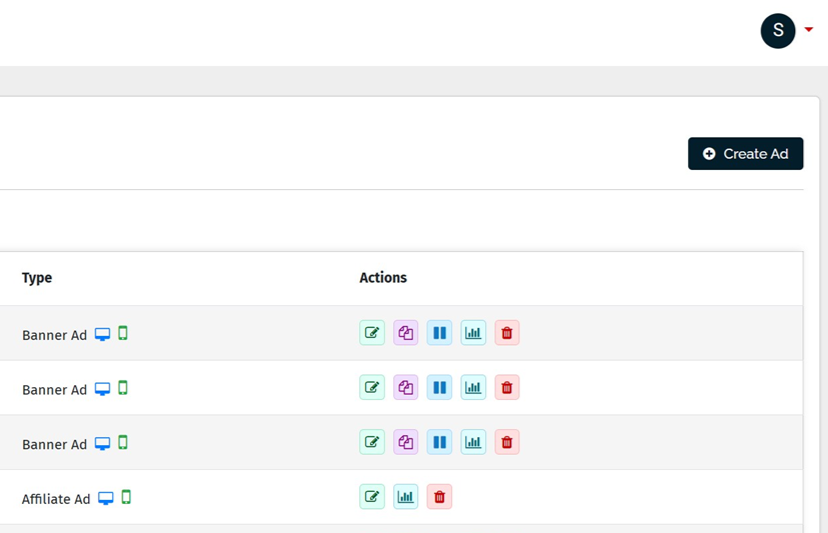
Action: Click Create Ad → choose Banner Ad.
Step 4: Enter Your Advert Details
The first fields request your destination link and your ad name. Enter your click-through URL, then give the banner a name you will recognise inside your campaign list. After this, upload your banner image file using the file selector. When the image is attached and details are correct, click Next to continue.
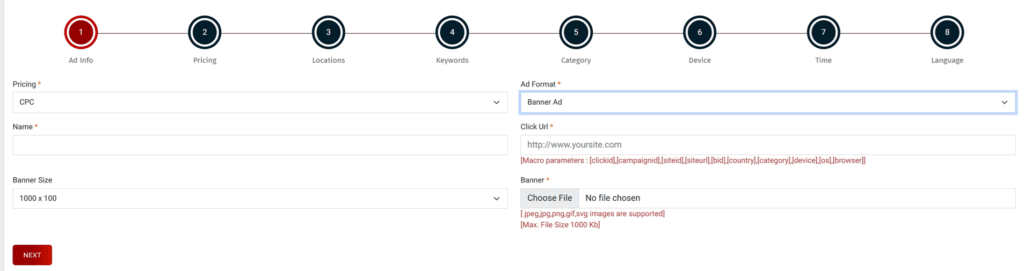
Action: Enter URL and name → upload banner → Submit.
Step 5: Set Your CPC and Budgets
The system now asks for your pricing details. Enter your CPC rate (minimum $0.01), followed by your total budget and daily budget (minimum $1.00 each). Once all values are entered, click Add Budget and then Next to move on. If you do not click add budget first your budget will not be assigned and it will not run.
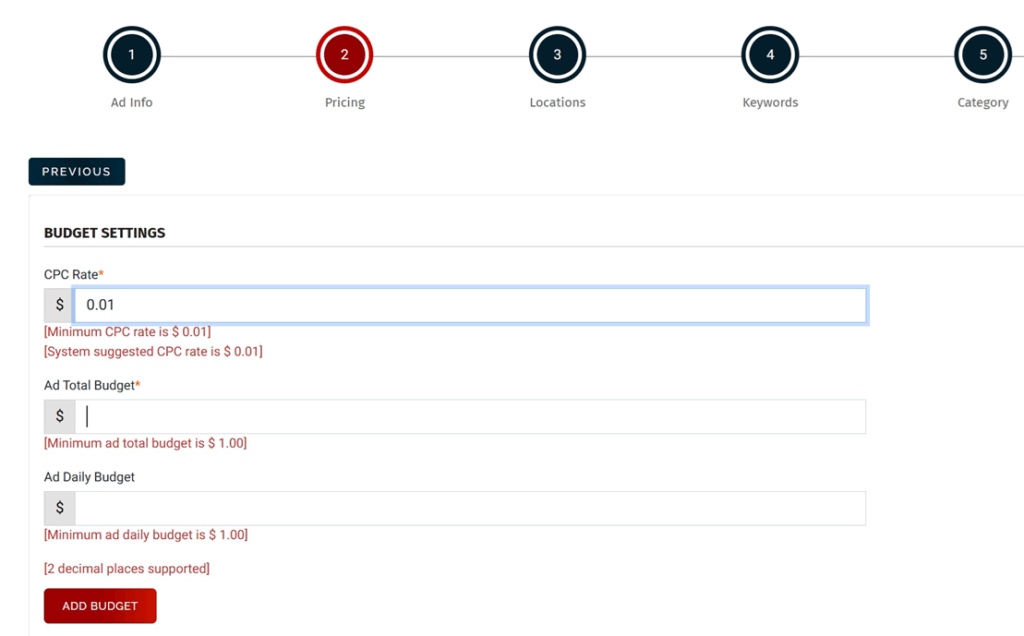
Action: Enter CPC rate, total budget and daily budget → Submit.
Step 6: Choose Your Location Targeting
The next screen allows you to limit your advert to specific countries or regions. You can leave everything blank to run globally, or select only the areas you want to reach. When your locations are selected, click Submit to confirm them. Once you have submitted click next, if you do not submit them or if you select none and click next your ads will run globally.
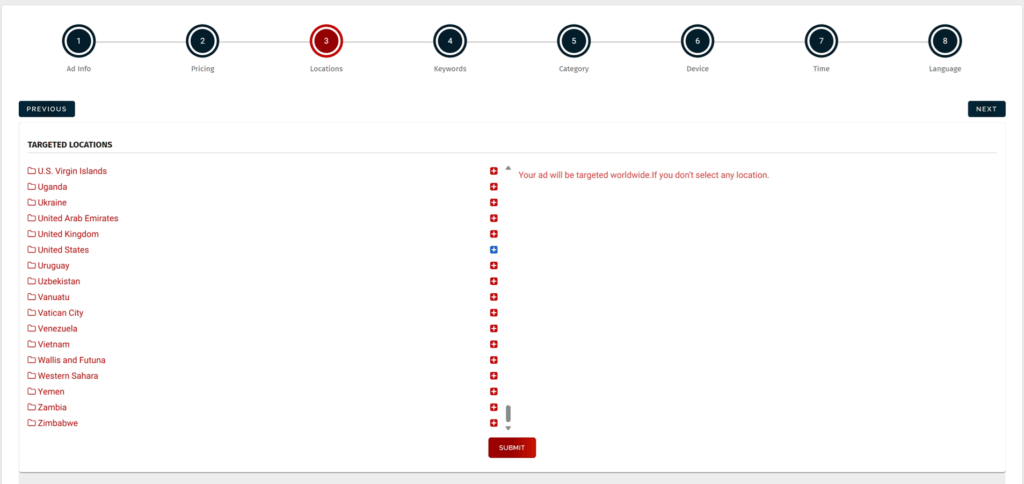
Action: Select locations → Submit.
Step 7: Add Keyword Targeting
If you want the system to show your advert only on pages containing certain keywords, enter them here. Type your keywords or keyphrases one per line and when your list is complete click add keywords, its recommended if you do want to target to select 50 phrases.. You can also leave this blank to run across the full network. When finished, click Next (make sure you have clicked add keywords if you are targeting specific words or it will Run network wide)
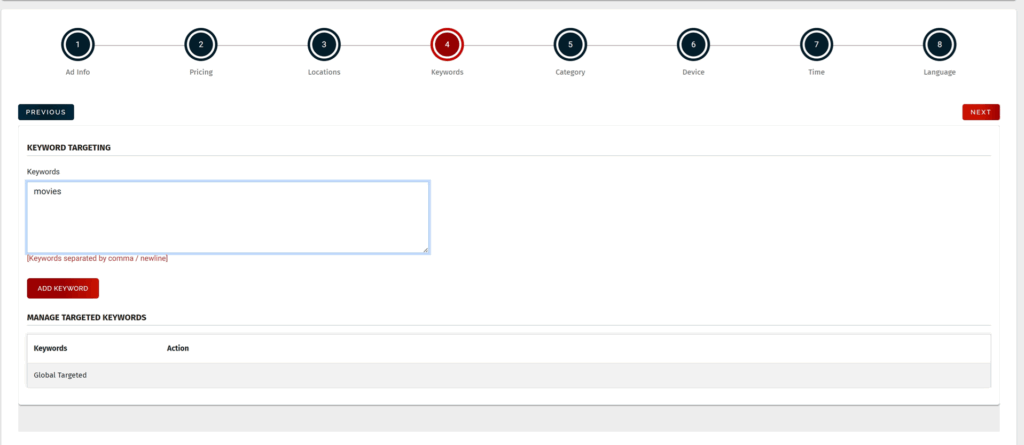
Action: Add keywords or leave empty → Next.
Step 8: Select Your Category
If your creative or landing page has any explicit or implied adult content—OnlyFans links, sexual themes, or material unsuitable for minors—you must choose Adult (NSFW / NSFW Implied). If the advert and destination are clearly designed for under-13s, such as toys, kids’ games or children’s educational content, you must choose Suitable for Children, which applies stricter safety rules. Almost everything else (standard products, blogs, software, mainstream entertainment, tutorials) belongs in General Audience, which is the default for normal campaigns.
If part of your content leans adult or child-directed, do not hide it in General Audience. Put that offer in its own campaign or adcode and tag it correctly instead. Mislabelled categories slow review, cause disapprovals, and can stop your ad from serving until fixed. The review team will not approve adverts without a valid category.
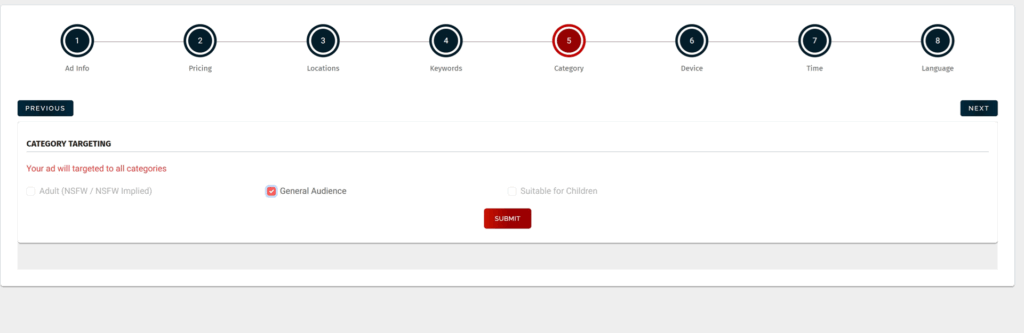
Action: Select Adult, General Audience or Suitable for Children based on both the banner and landing page → Submit → Next.
Action: Select categories → Submit → Next.
Step 9: Choose Device Targeting
Device targeting controls which types of hardware your banner is actually served on. A design that looks great on desktop can become cramped or unreadable on a small phone screen, and the reverse is also true. If your landing page is not mobile friendly, sending paid clicks from mobiles wastes budget and harms performance. You can choose to run on all devices for maximum reach, or restrict delivery to desktop, mobile and tablet as needed so that users only see your advert where it genuinely works. Once you are comfortable with the basics, you can refine this further by narrowing to specific operating systems and browsers, but the initial device choice sets the overall direction for your traffic.
Once you have selected all you want to target press update then next (WITHOUT CLICKING UPDATE IT WILL TARGET ALL).
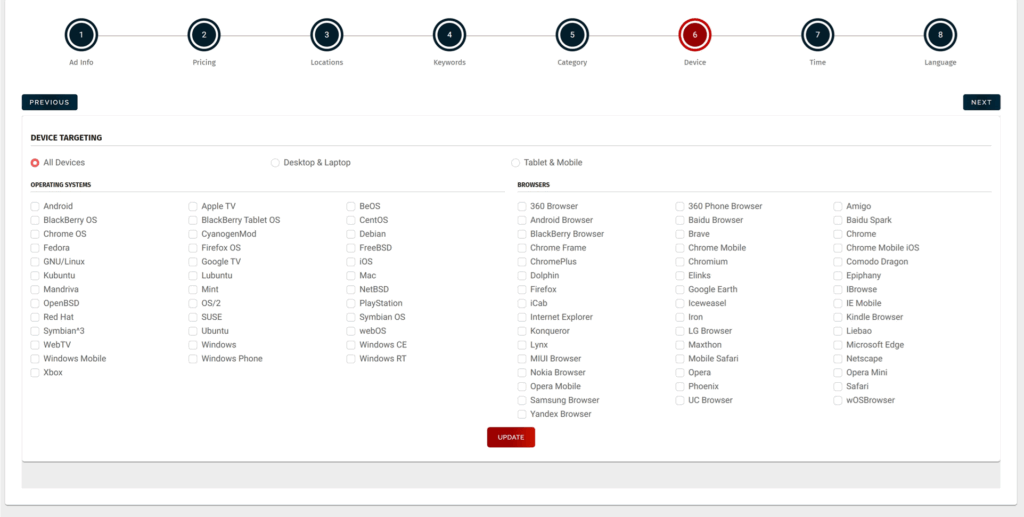
Action: Select the device types your banner and landing page properly support → Submit.
Step 10: Configure Time and Date Options
This section determines when your advert is allowed to run. If your campaign performs best at certain times of day, or if your business hours matter, scheduling can prevent wasted impressions and improve results. You can allow the advert to run without limits, or choose specific dates, hours and days that suit your audience. After choosing your timing rules, always click Update so the schedule is actually saved. When the page confirms the update, click Next to continue.
Action: Set your timing rules → click Update → click Next.
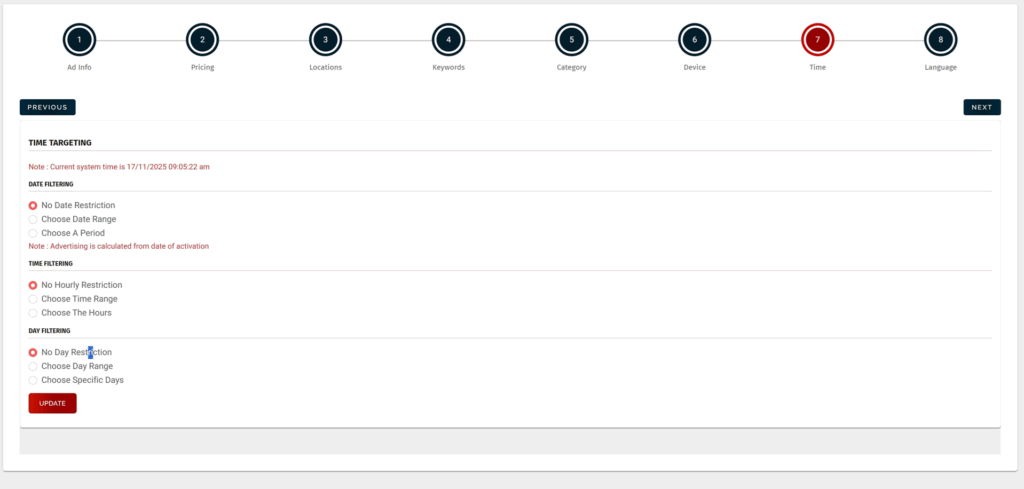
Action: Set time restrictions or leave unrestricted → Submit.
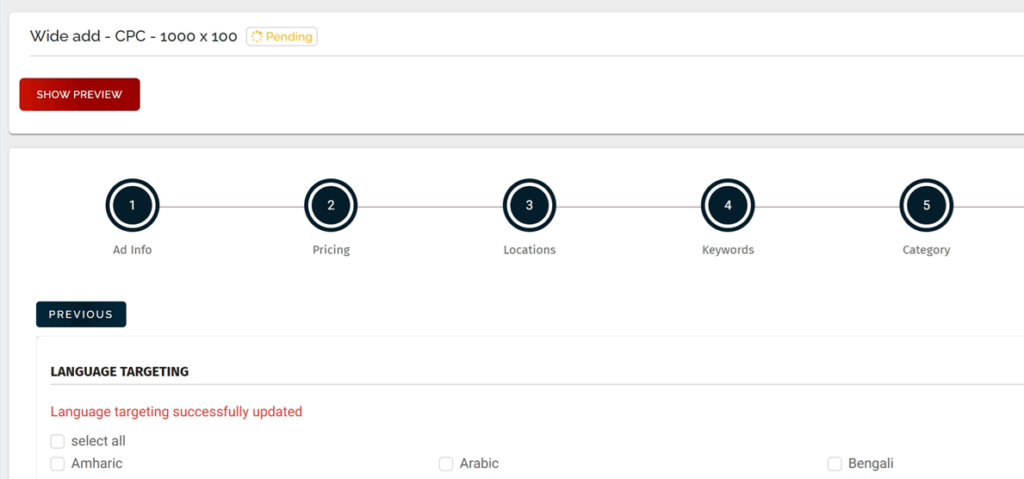
Step 11: Select Language Targeting
Language targeting ensures your banner only appears where users can understand the message. If your advert and landing page are English-only, selecting English prevents impressions from going to unrelated language environments. If your content supports multiple languages, choose each one that applies. Once you’ve selected your languages, click Update to apply the settings, then click Next to move on.
Action: Select languages → click Update → click Next

Action: Select language → Submit.
Completion and Next Steps
Once you have set your language targeting and clicked Update, the advert setup is complete. The campaign now appears in your Manage Ads list with its status set to pending, and the language screen simply remains available so you can adjust settings at any time. From here you can use the Show Preview button at the top of the page to see how your banner will look, or move back through the numbered steps if you want to tweak pricing, locations, keywords, category or devices. When you are satisfied, you can navigate away to any other section of the advertiser dashboard, knowing the banner and all its targeting choices have been saved.
Action: After language targeting is updated, review your banner using Show Preview or return to Manage Ads to monitor and optimise the campaign.